Maybe you've got a dedicated media center machine or an Apple TV, or perhaps you're using a dedicated hard drive connected to a home office computer to store media files.
At any rate, you're using iTunes as your media player of choice, and you're tired of running to a keyboard every time you want to change songs or pause a movie. Me too.
So I downloaded Apple's Remote app from the iTunes App Store.
Remote is among the free apps, not surprisingly. Apple wants you to walk around the house with your iPhone, not just take it with you when you leave.
The download was smooth and straightforward, even though I actually installed the app while my iPhone was connected to a public network far from home.
Hook 'Er Up
Once installed, the app asks users to Choose a Library, with the additional instructions to select the iPhone from the Devices list upon opening iTunes on the computer that houses the target iTunes library.
For me, that was the household's desktop iMac running Mac OS X version 10.4.11. (Note that Macs running any version earlier than OS X 10.3 do not support PEER1 Managed Hosting - free firewall and SAN Backup for six months. Click to learn more. a version of iTunes recent enough to support the iPhone.)
The installation screen gave me the additional instructions that I could add a library from an Apple TV by choosing Remotes from the General menu in the Settings tool.
Since most of us are more likely to be able to keep track of an iPhone much more easily than the little white remote that comes with the Apple TV, this app should relieve clicker-loss anxiety for lots of Apple TV owners.
Don't Panic
Here's a hint for those of you who may have, like me, many playlists that fall under your iPhone's device name in the iTunes Devices list: Scroll down. The app instructions are referring not to the device actually connected to iTunes (your iPhone), but to the item in the "Devices" list that appears with exactly the same name as your device ("Jane Doe's iPhone") with a small remote icon to the left. This is the only potentially confusing moment in the installation process.
Once you've located that device name with the remote icon, click on it to finish adding the library. Apple provides a four-digit passcode visible on the screen of the iPhone. Enter it into the boxes on the iTunes screen (on the computer housing your target library), and the installation is complete.
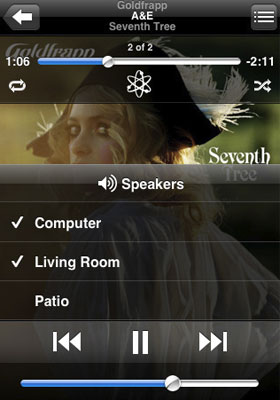
Within two minutes, I was done and able to control iTunes directly from the iPhone. The interface is nearly identical to the iPod menus and thus should be familiar to all iPhone users.
Walk Around
This is not an app that has to run on top of everything else on an iPhone (like, say, Pandora), so the screen may eventually blank as the iPhone goes to sleep or users navigate to other tools, such as Safari or email.
When returning to Remote, simply re-tap the Remote icon on the iPhone's screen to view the last-used app screen. The Settings menu allows users to instruct the iPhone to Stay Connected to the iTunes library through the wireless network and notes that the wake-up time for Remote (the gap between tapping on the Remote icon and having access to the library remotely) will be faster with this choice selected.
My nanosecond-measuring senses must be rather dull, though, because I noticed no appreciable difference between wake-up times with the setting on or off. Plus, as with many apps that use wireless connectivity, battery drain probably is a bigger concern.
Bottom line: Apple developed it. It works. It makes life very convenient. It's free. Download it.
No comments:
Post a Comment